Contact Info

Windows Server 2008 R2

Category Archives

Create a ready to deploy Windows 2008 R2 Template

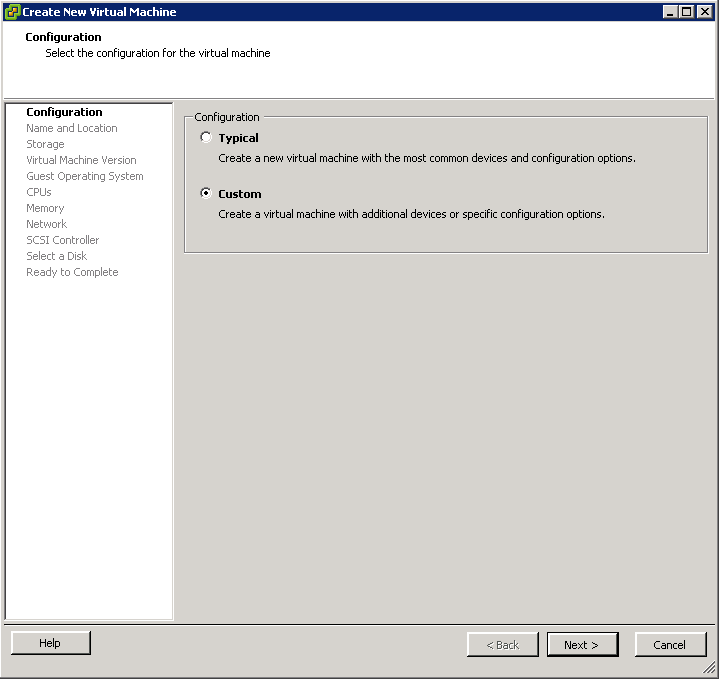
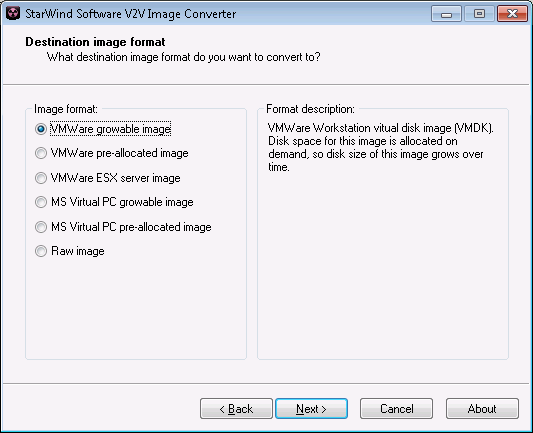
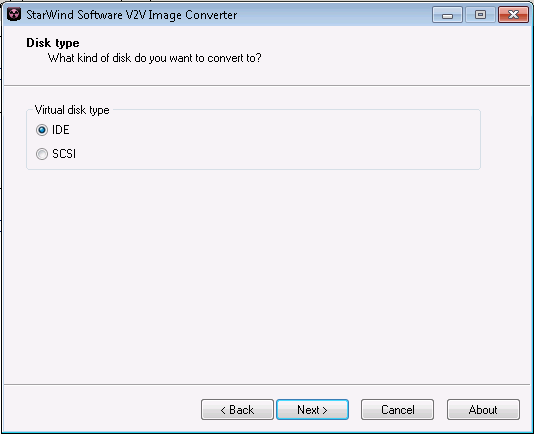
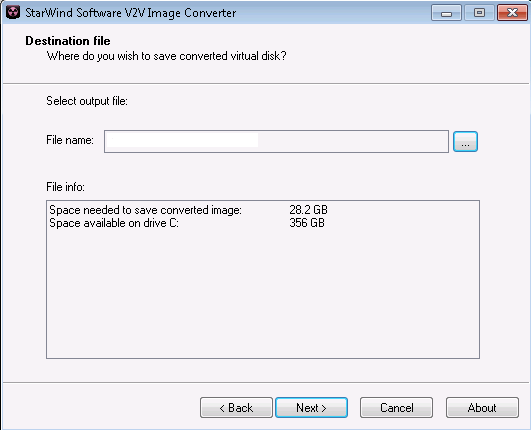
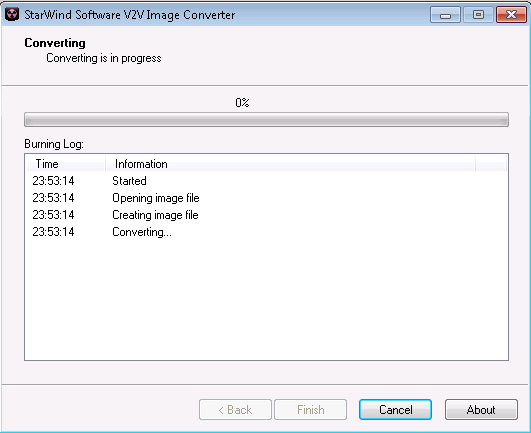
Here is a quick way to get a generalized VM up and running on your favorite hypervisor:

  1. Install your OS
  2. Install virtualization tools (VMware Tools, XenTools, etc.)
  3. Install patches and make necessary OS/System changes
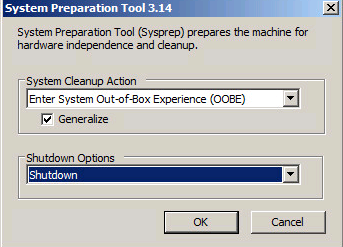
  4. Run C:\Windows\System32\sysprep\sysprep.exe
    • Select Enter System Out-of-Box Experience (OOBE)
    • Select Shutdown
    • Click OK

 create-sysprep-2008r2-1

  1. After the VM has been shutdown, convert it to a template
  2. To test, create a new VM from the template
  3. At boot up, Windows setup will begin
  4. When prompted, complete the setup wizard and begin using your VM

create-sysprep-2008r2-2


Create a new VMware VM with the converted VMDK

This entry is part 4 of 6 in the series Convert PVS images from XenServer to VMware


  1. Right-click an ESXi host that has access to the VMDK-NFS NFS Datastore created earlier and select New Virtual Machines…

create-a-new-vmware-vm-with-the-converted-vmdk_1

  1. Select Custom, click Next

create-a-new-vmware-vm-with-the-converted-vmdk_2

  1. Enter Name and Location, click Next

create-a-new-vmware-vm-with-the-converted-vmdk_3

  1. Select the VMDK-NFS NFS Datastore create earlier, click Next

create-a-new-vmware-vm-with-the-converted-vmdk_4

  1. Modify the Virtual Machine Version, Guest Operating System, CPUs, and Memory as necessary.  Proceed to the Network step.
  2. Select the appropriate Network and select the VMXNET3 adapter, click Next

create-a-new-vmware-vm-with-the-converted-vmdk_1_6

  1. Select LSI Logic SAS, click Next

create-a-new-vmware-vm-with-the-converted-vmdk_1_6.2

  1. Select Use an existing virtual disk, click Next

create-a-new-vmware-vm-with-the-converted-vmdk_1_6.3

  1. Browse to the converted VMDK file within the VMDK-NFS NFS Datastore, click OK

create-a-new-vmware-vm-with-the-converted-vmdk_1_7

  1. Select remaining defaults, click Finish

Convert VHD to VMDK

This entry is part 3 of 6 in the series Convert PVS images from XenServer to VMware


  1. Download and install StarWind V2V Converter on the PVS host
  2. Run StarWind V2V Image Converter

convert-vhd-to-vmdk_1

  1. Click Next

convert-vhd-to-vmdk_2

  1. Select the newly merged VHD file from the PVS Store, click Next

convert-vhd-to-vmdk_3

  1. Select the appropriate VMware image format, click Next
    NOTE: In this case, the VHD file was a dynamic disk so we chose VMware growable image. Choosing the wrong image type may result in BSOD. This step might require trial and error if you are unsure of what to choose.

convert-vhd-to-vmdk_4

  1. Select IDE for virtual disk type, click Next

convert-vhd-to-vmdk_5

  1. Browse to the VMDK NFS share created earlier and provide a file name for the new VMDK, click Next

convert-vhd-to-vmdk_7

  1. The conversion process will begin

convert-vhd-to-vmdk_8

  1. Click Finish when complete

Create a Windows Server 2008 R2 NFS share for vSphere 5.1

This entry is part 2 of 6 in the series Convert PVS images from XenServer to VMware

Install Network File Services on one of the PVS hosts

  1. Select Add Roles from Server Manager

create-windows-server-2008-r2-nfs-share-for-vsphere-5-1_1

  1. Select File Services, click Next

create-windows-server-2008-r2-nfs-share-for-vsphere-5-1_2

  1. Select Services for Network File System, click Next

create-windows-server-2008-r2-nfs-share-for-vsphere-5-1_3

  1. Select Install

create-windows-server-2008-r2-nfs-share-for-vsphere-5-1_4

Once installed, create an NFS Share on the PVS host

  1. Create a folder on a drive that has adequate disk space and name it VMDKs
  2. Open the properties of the new folder, select the NFS Sharing tab, and select Manage NFS Sharing…

create-windows-server-2008-r2-nfs-share-for-vsphere-5-1_5

  1. Configure the settings as displayed, and click Apply

create-windows-server-2008-r2-nfs-share-for-vsphere-5-1_6

create-windows-server-2008-r2-nfs-share-for-vsphere-5-1_7

Add NFS Storage to a VMware ESXi host

  1. Open vCenter and select one of the ESXi hosts
  2. Select the Configuration tab and select Storage under the Hardware section
  3. Select Add Storage…

create-windows-server-2008-r2-nfs-share-for-vsphere-5-1_10

create-windows-server-2008-r2-nfs-share-for-vsphere-5-1_9

  1. Select Network File System, click Next

create-windows-server-2008-r2-nfs-share-for-vsphere-5-1_11

  1. Enter the PVS hostname and NFS share name created earlier, click Next

create-windows-server-2008-r2-nfs-share-for-vsphere-5-1_12

  1. Select Finish

create-windows-server-2008-r2-nfs-share-for-vsphere-5-1_13

  1. Once the NFS share has mounted check the Datastores to confirm its available to the host

create-windows-server-2008-r2-nfs-share-for-vsphere-5-1_14

create-windows-server-2008-r2-nfs-share-for-vsphere-5-1_15


Merge PVS image to base

This entry is part 1 of 6 in the series Convert PVS images from XenServer to VMware


On a recent project, a customer had Citrix Provisioning Server 6.1 delivering XenApp and XenDesktop images to XenServer 6.0.2. They required a conversion of the XenApp and XenDesktop images to VMware vSphere 5.1 to simplify their DR plan. They also requested an upgrade to Provisioning Server 7.1 as part of the project.

Rather than rebuild each image, we decided to convert the images from VHD to VMDK and convert back to VHD for PVS 7.1 streaming to vSphere 5.1. Here are the steps we took to complete this task.

  1. Right-click the image and select Version…

Merge_PVS_image_to_base_1

  1. Select Merge…

Merge_PVS_image_to_base_2

  1. Select Merge Base and Maintenance Mode, click OK

Merge_PVS_image_to_base_3

  1. Wait for the image to finish merging

OPTIONAL: While Windows makes the magic happen, open resource manager to monitor disk reads and writes on the VHD files.

Merge_PVS_image_to_base_4

  1. Once the merge has completed, click Done.

Merge_PVS_image_to_base_5